Create Your First Theme on YouCan
YouCan provides a set of tools that makes the developer experience smooth, simplifying the process and helping you as a developer build themes faster and more flexibly.
In this article, we'll focus on how you can build a custom theme using YouCan CLI and the default starter theme provided by YouCan. However, you have the freedom to create a theme entirely from scratch and publish it on the YouCan platform.
What you'll learn
After you've finished this tutorial, you’ll be able to:
- Develop a customized theme with unique features ;
- Implement changes and enhancements easily ;
- Successfully deploy and showcase your published theme on YouCan platform.
Prerequisites
To start creating a theme for YouCan, you need to set up your working environment first.
- Create a YouCan Partner Account and set a development store.
- Ensure Required Software: YouCan CLI is built and run on the Node.js JavaScript runtime. To use it, you must have npm, NodeJs, and git installed.
- Familiarity with HTML, CSS, and Liquid: Proficiency in these languages will help you create custom themes efficiently.
- Select a Code Editor for managing the codebase.
Start building your theme: a step-by-step Guide
In this tutorial, you'll use a development store, YouCan CLI, and Dusk theme to create a custom theme and publish it on YouCan.
Step 1. Set up Youcan CLI
Use the command-line interface tool for building YouCan themes with a set of helpful features that help you speed up your development experience. If you haven’t installed YouCan CLI, run:
npm install -g @youcan/cli@latest @youcan/theme@latestTo make sure the installation was successful, run the following command to verify the installation and display the available commands.
youcan --helpINFO
💡 YouCan CLI provides a set of commands to simplify theme development. Each command targets a specific purpose, making it easier to create and manage themes for YouCan stores. Find out more about YouCan CLI Commands.
Step 2. Access your dev store
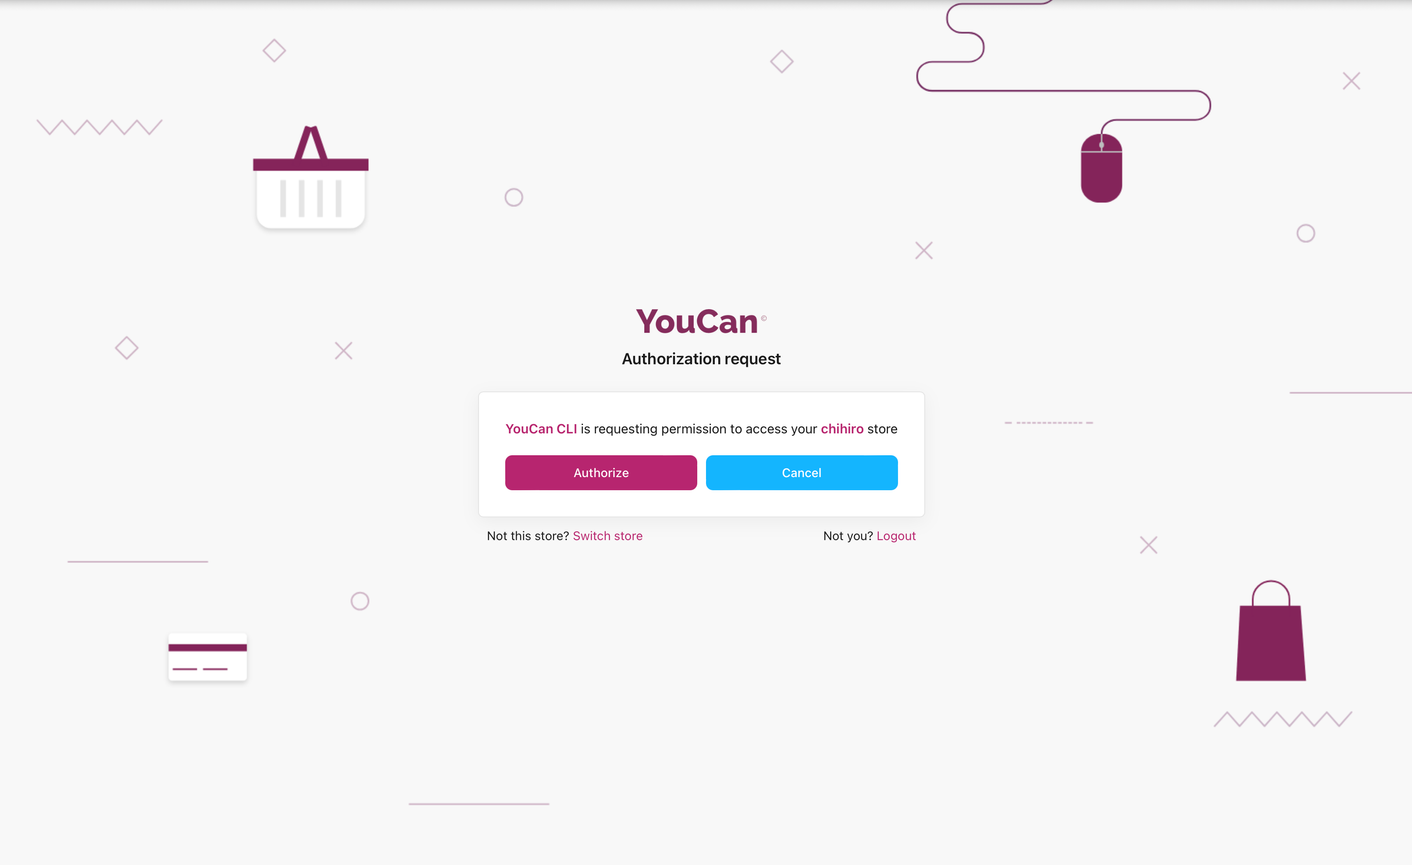
Next, run the following command to authorize the CLI to access your YouCan Store.
youcan auth loginA new page will appear for authorization. Click on 'Authorize' to grant access.
Step 3. Initialize a new theme using Dusk theme
Dusk Theme is YouCan's reference theme, built for performance, flexibility, and ease of use. It acts as the starting point to help you build a theme.
In your terminal, navigate to the working directory where you want to clone your dev theme.
Enter the following command to pull the default starter theme from the YouCan git repository:
youcan theme initAfter successful initialization, the theme is created with a unique ID specific to your dev theme.
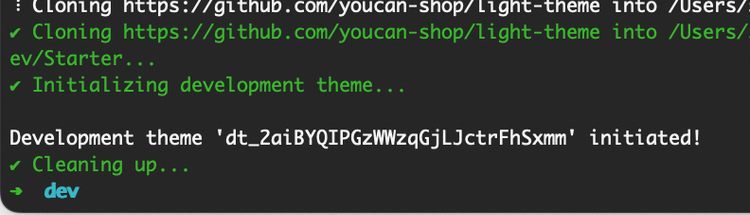
YouCan CLI uploads this theme as a development version to the store you're connected to, ready for further modifications in your local code editor.
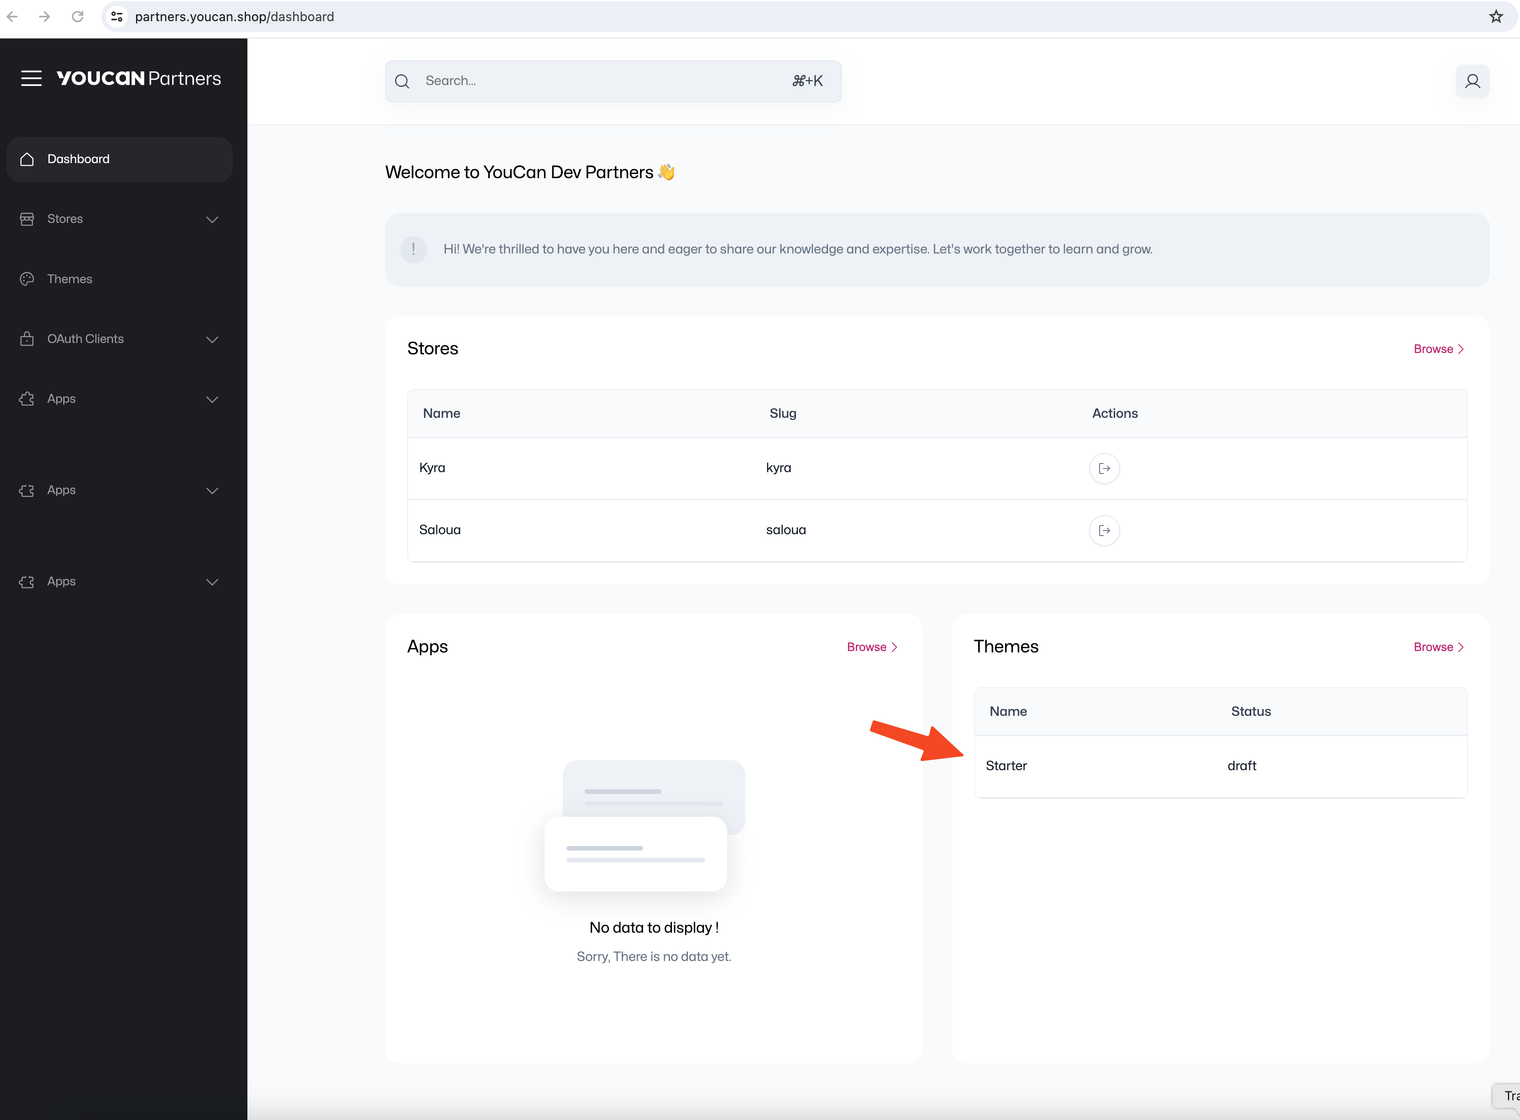
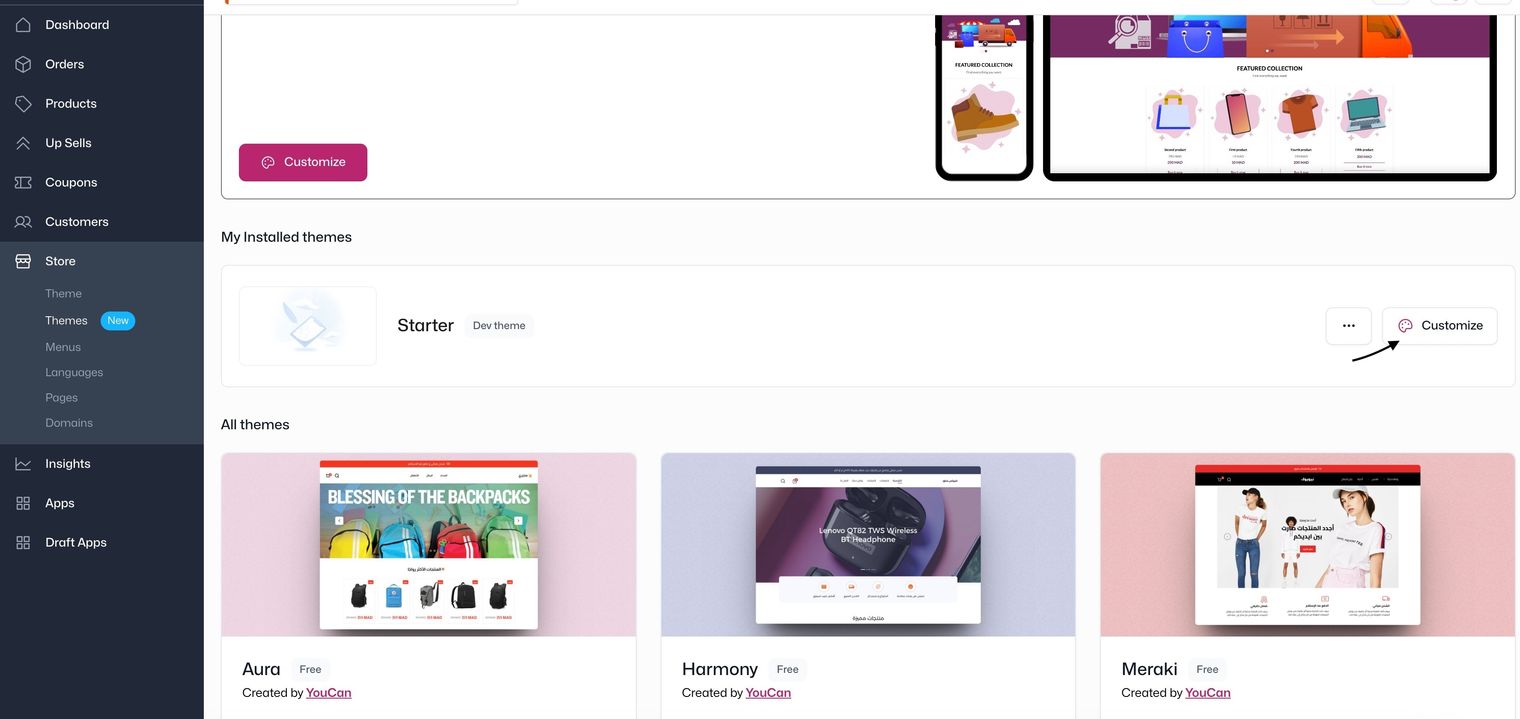
If you visit your YouCan Partner dashboard or seller area, you'll notice the starter theme has been effectively installed.
Understand YouCan Theme Architecture
Get to know how your YouCan theme works! The architecture determines how the features and elements are displayed.
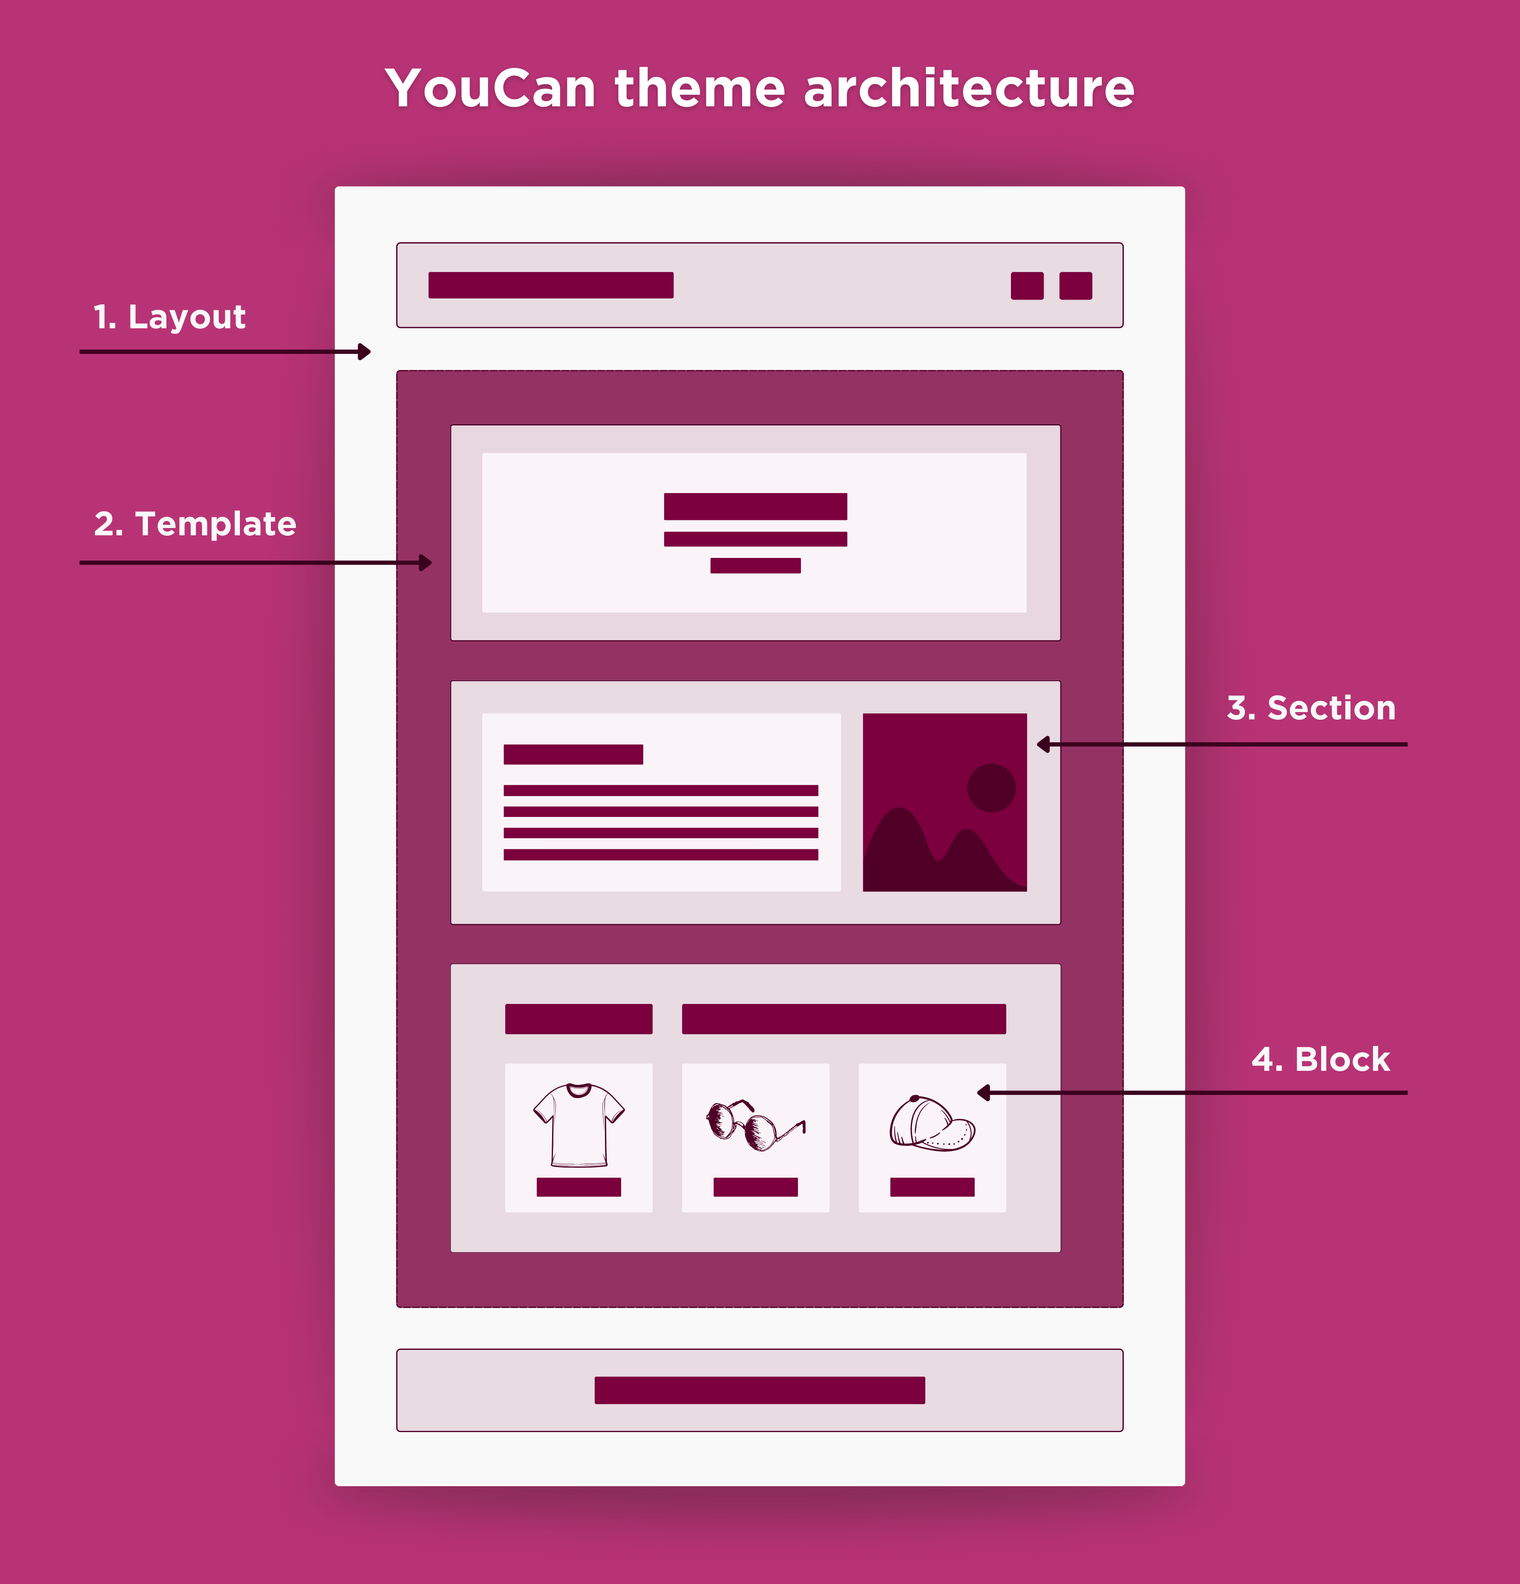
YouCan theme architecture can be broken down into the following components:
Layout: The base of a theme that can be reused across the website to feature the basics like headers and footers.
Templates: These elements control what’s displayed on the page. Each page has its own associated template type.
Sections: Reusable modules of content that are displayed on the page. For example, you can create an “Image with text” section that will showcase an image and text side-by-side with options to customize its placement, colors, etc.
Blocks: Types of content modules that can be added, removed, and reordered within a section. A block could be an image, a video, or text.
Directory Structure
Once you open the dev theme in your local code editor, you'll find this following structure that determines the organization of each page:
.
├── assets
├── config
├── layout
├── locales
├── sections
├── snippets
└── templatesLearn more about each directory here.
Get acquainted with Liquid
Liquid is a template language that merges static page elements with dynamic data from the YouCan store. It simplifies building your theme by acting as a placeholder for your store’s data.
The static elements are written in HTML, and the dynamic elements are written in Liquid, which uses a combination of tags, objects, and filters to load dynamic content. Liquid can be quickly identified by its two delimiters:
- Double curly braces , which indicate output
- Curly braces with percentages {% %}, which denote logic
This snippet represents both dynamic rendering and static content integration by showcasing product cards using product objects.
<!-- Static HTML Elements -->
<div class="static-content">
  <h1>Welcome to YourCan Store!</h1>
  <p>Explore our latest products:</p>
</div>

<!-- Dynamic Rendering with Liquid -->
{% if items and items.size > 0 %}
  <ul class="product-grid">
    {%- for product in items -%}
      <li id="Slide-{{ section.id }}-{{ forloop.index }}" class="product-item">
        <h3>{{ product.title }}</h3>
        <img src="{{ product.image }}" alt="{{ product.title }}">
        <p>Price: {{ product.price | money }}</p>
      </li>
    {%- endfor -%}
  </ul>
{% endif %}Objects:
section.id: This represents the object usage, where section refers to the section object and .id accesses its ID.
Tags:
{% if ... %} ... {% endif %}: This tag structure executes a conditional statement based on the existence of items.
{%- for ... -%} ... {%- endfor -%}: Utilizes a for loop to iterate through each product in the items.
Filters:
The "| money" filter can be utilized to format any numeric value that represents a monetary amount.
Section Schema
The section schema outlines structure and settings for specific sections in your theme, making it easy to customize directly from the store's theme editor.
{% schema %}
{
  "label": "Featured collection",
  "tag": "section",
  "class": "section",
  "settings": [
    {
      "type": "richtext",
      "id": "title",
      "default": "Featured collection",
      "label": "Heading"
    },
    {
      "type": "select",
      "id": "heading_size",
      "default": "h1",
      "label": "Heading size"
    }
  ]
}
{% endschema %}JSON templates for sections
Utilize JSON templates for sections in YouCan themes to boost flexibility. These files store section lists and settings, enabling easy customization directly from the theme editor.
The following is an example of the homepage template, focusing on the "image banner" section:
//templates/index.json

"sections": {
    "image_banner": {
      "type": "image-banner",
      "blocks": {
        "heading": {
          "type": "heading",
          "settings": {
            "heading": "Image banner",
            "heading_size": "h0"
          }
        },
        "text": {
          "type": "text",
          "settings": {
            "text": "Insert text here.",
            "text_style": "body"
          }
        },
        "button": {
          "type": "buttons",
          "settings": {
            "button_label": "Shop all"
          }
        }
      },
      "order": [
        "heading",
        "text",
        "button"
      ]
    }
}Step 4. Customize your theme
Now, feel free to modify the theme code according to your preferences!
Although the provided theme serves as a starting point and offers the possibility to modify any aspect of it, it is best to ensure all changes adhere to the provided architecture, this allows flexibility while safeguarding the essential functionalities of the theme.
For this example, we’ll create a new section to add to the theme’s landing page:
Next, we’ll focus on how you can view these modifications live while working on the code.
Step 5: Preview your changes
Once you've made changes to the theme, launch your local development server to interact with the theme in your browser.
Navigate to your theme folder.
Enter the following command to start your local development server:
cd Starter
youcan theme devThis action will redirect you to a new page displaying the theme,which enables you to view and test the modifications in real-time.
To see your newly added section, go to themes in the seller area, and click on the “customize” button of the currently installed theme.
This will redirect you to the theme editor, where you'll find the added section displayed, here’s a live demo on how to add the section to your template.
Step 6: Publish your theme
To publish your customized theme, head to your partner dashboard. Navigate to the "Themes" section, locating your customized theme within the development segment. Click on "Review" for the theme. By doing so, YouCan will receive the theme and proceed with approving it for publishing.
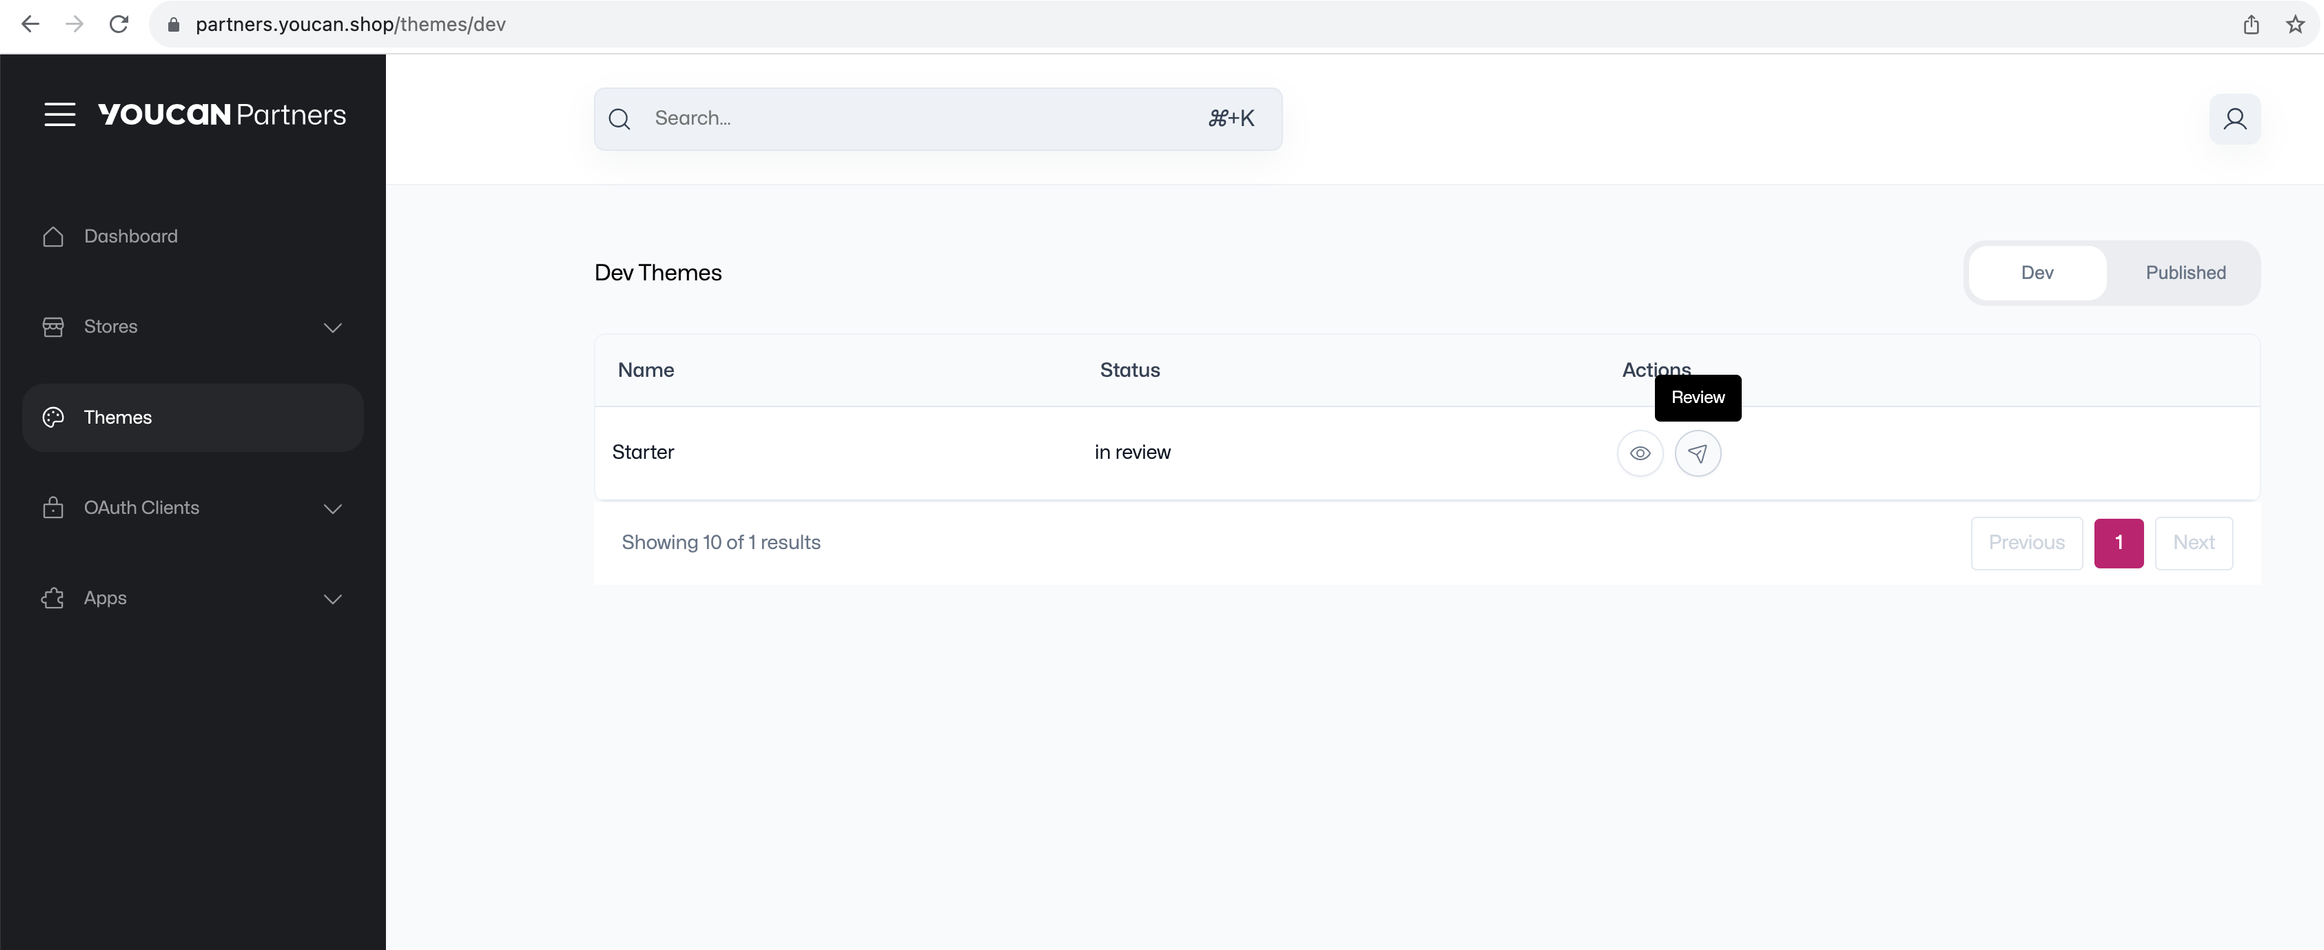
WARNING
Please note that once in this review phase, any further modifications to the theme will be restricted as it gets locked during the review process
Conclusion
Congratulations on creating your first theme! As a YouCan partner, your journey begins with shaping exceptional user experiences. Strive to create themes that stand out from the rest. Your special touch will create amazing experiences for both sellers and their customers!